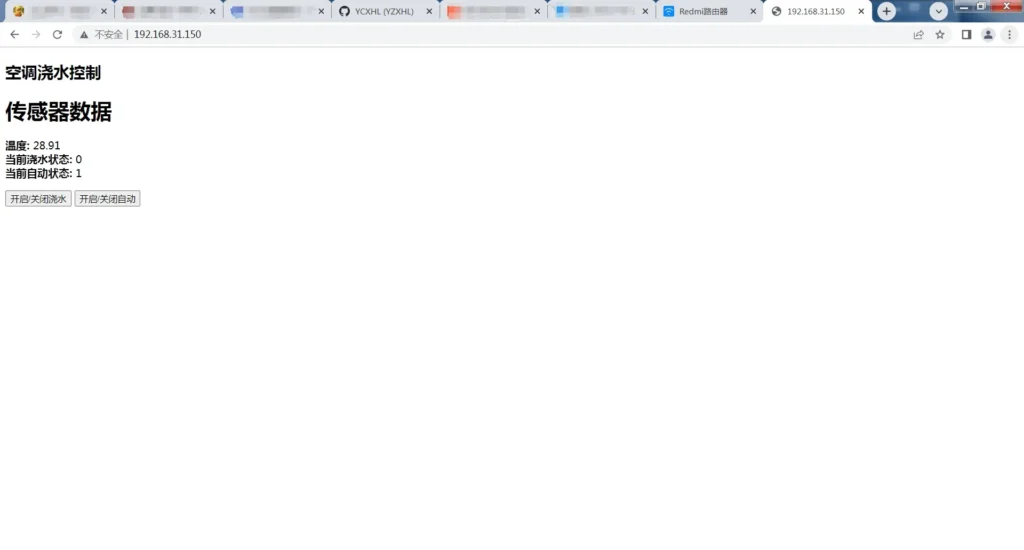
[Hobby] ESP32 Smart Water Spray Cooling System
Project Highlights
- [x] Web Control: Access the device IP to view temperature and automation status in real time
- [x] Manual/Auto Dual Mode: Toggle watering on/off anytime via the web page (manual mode temporarily exits automation to avoid wasting water)
- [x] Smart Temperature Control: In auto mode, watering starts automatically when temperature ≥30℃, and stops automatically when <30℃
- [ ] The web page has not yet been styled with CSS; it is only a functional demo and can be beautified as needed
Origin: The air conditioner broke down, and the problem was with the outdoor unit
The summer of 2024 in Hubei was exceptionally unbearable. The air conditioner at home had extremely poor cooling performance, basically rendering it useless.
After much troubleshooting, through the controlled variable method I checked item by item and finally locked onto the real culprit——Poor heat dissipation on the outdoor unit's back panel(blocked by the cabinet panel, preventing heat from escaping).
The temporary solution I thought of was simple and crude:Use a water pump to spray water at the outdoor unit to force cooling。
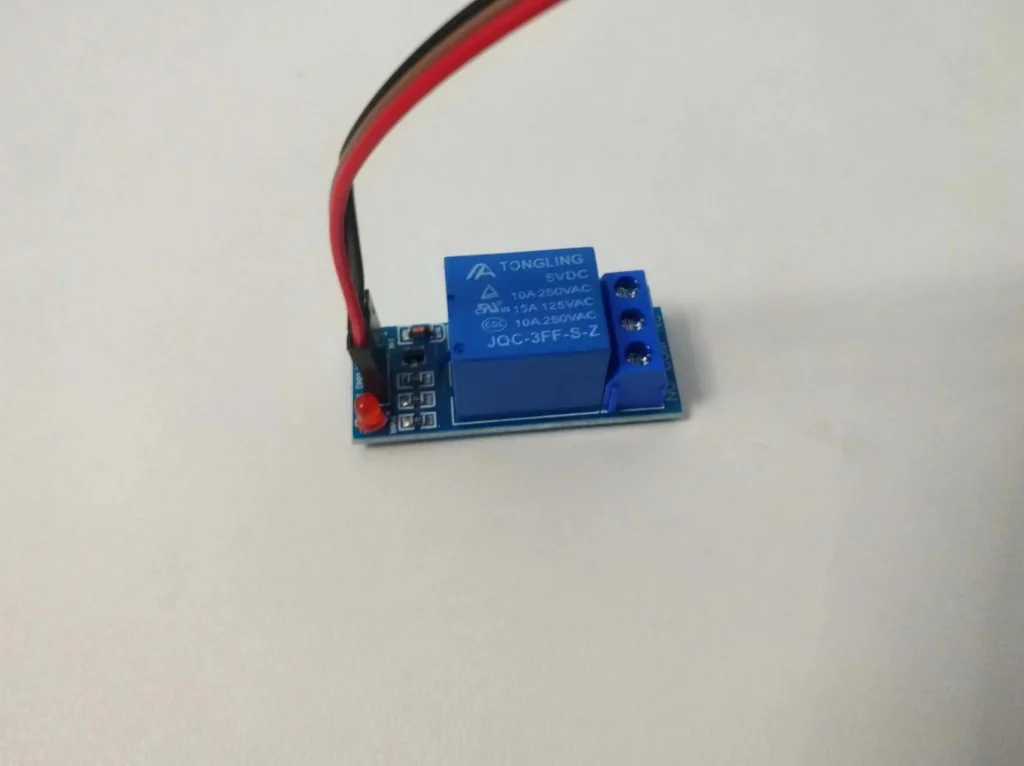
Bought a water pump, relay, and other modules from TB, connected the power, and it ran. First step success!
New problem: Continuous spraying wastes too much water
Manual switching is not only troublesome, but when no one is home, it either runs dry or wastes water.
I started thinking about how to make the systemautomatically start and stop based on temperature。
Suddenly I remembered the MPU6050 six-axis sensorleft over from last year when I was doing rocket attitude correction. It has a built-in NTC temperature module.
Although it was originally used to detect chip temperature, the MPU6050 itself generates very little heat, so it can be approximately treated as ambient temperature.
So I “borrowed” it from the rocket and paired it with ESP32-C3 to implement temperature control.
Hardware Wiring
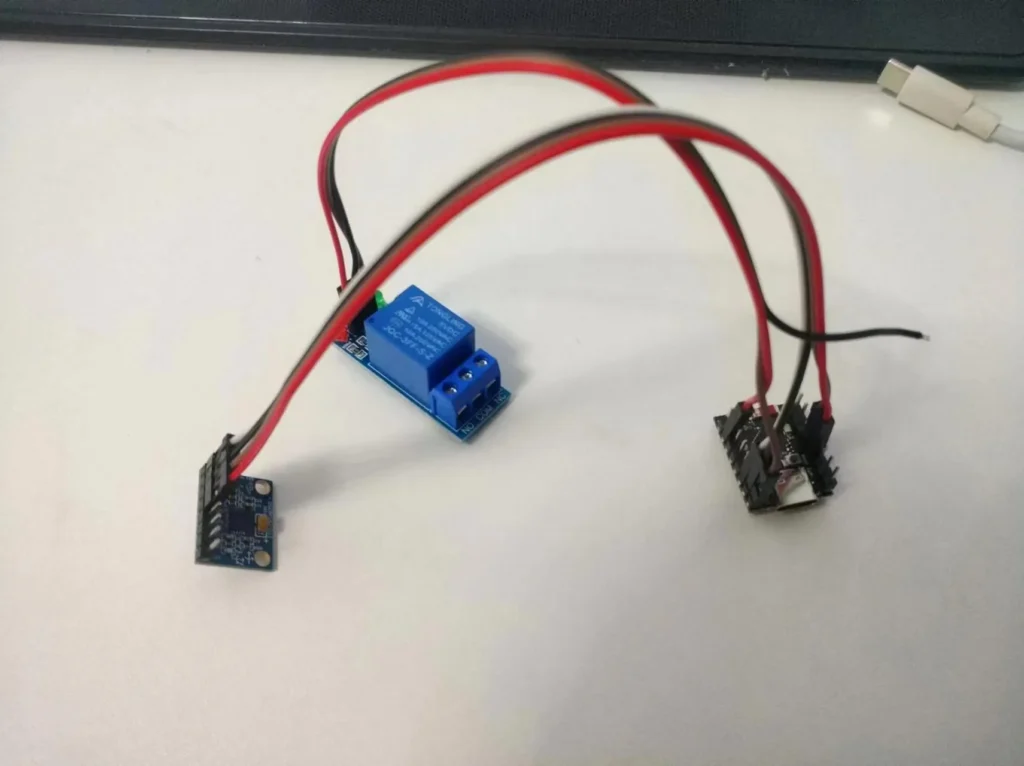
The wiring between the MPU6050 and ESP32-C3 is very simple (left: MPU6050, right: ESP32-C3):
| MPU6050 | ESP32-C3 |
|---|---|
| VCC | 3V3 |
| GND | GND |
| SDA | P8 (SDA) |
| SCL | P9 (SCL) |
Software Design
Development Environment:Arduino IDE
Core Idea: ESP32-C3 starts a lightweight web server. After a phone or computer connects, it can see real-time temperature and watering status, and can manually control or enable automation via buttons.
Main Features:
- Access root path
/Returns the control page /dhtInterface returns sensor data (real-time temperature, watering status, auto status)/setInterface switch watering switch (also turns off auto mode)/autoInterface switch auto mode- Automation logic: temperature ≥30℃ turn on water, <30℃ stop water
The complete code is as follows:
#include <Adafruit_MPU6050.h>
#include <Adafruit_Sensor.h>
#include <WiFi.h>
#include <ESPAsyncWebServer.h>

AsyncWebServer server(80);   // 端口80,可直接通过IP访问

// 网页 HTML(存储于 Flash)
const char index_html[] PROGMEM = R"rawliteral(
<!DOCTYPE HTML>
<html>
<head>
    <meta charset="utf-8">
    <title>空调浇水控制</title>
</head>
<body>
    <h2>空调浇水控制</h2>
    <div id="dht"></div>
    <button onclick="set()">开启/关闭浇水</button>
    <button onclick="autoset()">开启/关闭自动</button>
</body>
<script>
    function set() {
        var xhr = new XMLHttpRequest();
        xhr.open("GET", "/set?value=ESP32", true);
        xhr.send();
    }
    function autoset() {
        var xhr = new XMLHttpRequest();
        xhr.open("GET", "/auto?value=ESP32", true);
        xhr.send();
    }
    // 每秒更新一次数据
    setInterval(function () {
        var xhttp = new XMLHttpRequest();
        xhttp.onreadystatechange = function () {
            if (this.readyState == 4 && this.status == 200) {
                document.getElementById("dht").innerHTML = this.responseText;
            }
        };
        xhttp.open("GET", "/dht", true);
        xhttp.send();
    }, 1000);
</script>
</html>
)rawliteral";

Adafruit_MPU6050 mpu;
#define MPU6050_INTERVAL 100       // 传感器读取间隔(毫秒)
unsigned long mpu6050Times = 0;
float mpu6050Temp = 0;

float xAcceleration, yAcceleration, zAcceleration;
float xAccele, yAccele, zAccele;
float xGyro = 0, yGyro = 0, zGyro = 0;
float gravity = 9.8;

bool iswater = false;  // 浇水状态
bool isauto = true;    // 自动模式默认开启

// 构造返回给网页的 HTML 数据
String Merge_Data(void) {
    String dataBuffer = "<p>";
    dataBuffer += "<h1>传感器数据</h1>";
    dataBuffer += "<b>温度: </b>";
    dataBuffer += String(mpu6050Temp, 1) + " ℃";
    dataBuffer += "<br />";
    dataBuffer += "<b>当前浇水状态: </b>";
    dataBuffer += iswater ? "开启" : "关闭";
    dataBuffer += "<br />";
    dataBuffer += "<b>当前自动状态: </b>";
    dataBuffer += isauto ? "开启" : "关闭";
    dataBuffer += "<br /></p>";
    return dataBuffer;
}

// 手动切换浇水(同时关闭自动模式)
void Config_Callback(AsyncWebServerRequest *request) {
    iswater = !iswater;
    isauto = false;
    request->send(200, "text/plain", "OK");
}

// 切换自动模式
void Auto_Callback(AsyncWebServerRequest *request) {
    isauto = !isauto;
    request->send(200, "text/plain", "OK");
}

void setup() {
    Serial.begin(115200);

    // 连接 WiFi(请替换为实际 SSID 和密码)
    WiFi.begin("你的WiFi名", "你的WiFi密码");
    while (WiFi.status() != WL_CONNECTED) {
        delay(500);
        Serial.println("正在连接WiFi...");
    }
    Serial.println("WiFi 连接成功!");
    Serial.print("IP 地址: ");
    Serial.println(WiFi.localIP());

    pinMode(1, OUTPUT);   // GPIO1 控制继电器(水泵)

    // 配置 Web 服务器路由
    server.on("/", HTTP_GET, [](AsyncWebServerRequest *request) {
        request->send_P(200, "text/html", index_html);
    });
    server.on("/dht", HTTP_GET, [](AsyncWebServerRequest *request) {
        request->send_P(200, "text/plain", Merge_Data().c_str());
    });
    server.on("/set", HTTP_GET, Config_Callback);
    server.on("/auto", HTTP_GET, Auto_Callback);
    server.begin();
    Serial.println("HTTP 服务器已启动");

    // 初始化 MPU6050
    if (!mpu.begin()) {
        Serial.println("未找到 MPU6050 芯片!");
        while (1) { delay(1000); }  // 停止运行
    }
    mpu.setAccelerometerRange(MPU6050_RANGE_16_G);
    mpu.setGyroRange(MPU6050_RANGE_250_DEG);
    mpu.setFilterBandwidth(MPU6050_BAND_21_HZ);
    Serial.println("MPU6050 初始化成功!");
}

void loop() {
    getMpu6050Data();   // 读取温度及姿态数据

    if (isauto) {
        // 自动模式:根据温度控制水泵
        if (mpu6050Temp >= 30.0) {
            digitalWrite(1, HIGH);
            iswater = true;
        } else {
            digitalWrite(1, LOW);
            iswater = false;
        }
    } else {
        // 手动模式:直接遵从按钮状态
        digitalWrite(1, iswater ? HIGH : LOW);
    }
}

void getMpu6050Data() {
    if (millis() - mpu6050Times >= MPU6050_INTERVAL) {
        mpu6050Times = millis();

        sensors_event_t a, g, temp;
        mpu.getEvent(&a, &g, &temp);

        mpu6050Temp = temp.temperature;

        xAcceleration = a.acceleration.x;
        yAcceleration = a.acceleration.y;
        zAcceleration = a.acceleration.z;

        xAccele = xAcceleration / gravity;   // 转换为 g 为单位
        yAccele = yAcceleration / gravity;
        zAccele = zAcceleration / gravity;

        xGyro = g.gyro.x;
        yGyro = g.gyro.y;
        zGyro = g.gyro.z;

        // 串口输出,便于调试(保留了姿态数据,方便后续扩展)
        Serial.print("温度: "); Serial.print(mpu6050Temp);
        Serial.print(" , x加速: "); Serial.print(xAccele);
        Serial.print(" , y加速: "); Serial.print(yAccele);
        Serial.print(" , z加速: "); Serial.print(zAccele);
        Serial.print(" , x角速度: "); Serial.print(xGyro);
        Serial.print(" , y角速度: "); Serial.print(yGyro);
        Serial.print(" , z角速度: "); Serial.println(zGyro);
    }
}